RuggedWrapDIY - Trackday & Offroad Protection Vinyl Wrap

Regular price
$9.99 USD
Sale price
Unit price per
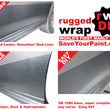
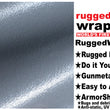
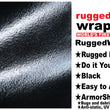
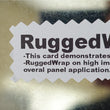
SUPER TOUGH: RuggedWrapDIY is Super Tough Vinyl Wrap with a unique Rugged Look, like a spray in bed liner, in an easy to apply roll size. RuggedWrapDIY is 5X thicker than standard vinyl and yet perfectly compliant to rounded surfaces when heated with a heat gun. RuggedWrap can be applied to portions of panels or over the entire vehicle. DOUBLE UP! You can cut and apply smaller sections of RuggedWrap to High Impact body areas and then overlay with RuggedWrap on the larger area for extreme protection.
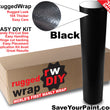
EASY DIY: RuggedWrapDIY is simple to apply yourself (check out our optional Application Kit). ★ It's pre-cut into manageable roll sizes for self-install. ★ Our optional Application Kit & Application Fluid provides everything you need to install yourself with great results. Note that we no longer put a hinge cut in the backing because we now have a very low initial tack on the adhesive, making the product very easy to install and postion. Adhesion is completed with pressure.
PROTECTIVE & EASY TO WASH: RuggedWrapDIY is 10X thicker than standard vinyl wraps and protects paint from rock chips and scratches. It has a tough look with a surface that is massively self-healing, yet is smooth enough to be easy to wash. DOUBLE UP! For extreme applications that require the most protection you can overlay RuggedWrapDIY onto itself. So cutting pieces to suit high impact areas, installing those first and then overlaying with the larger sheet produces extreme protection and clean finish with no hard edges.
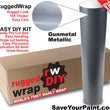
ANY COLOR IS POSSIBLE: The Universe of Colors is open to you! RuggedWrap can be made in ANY color. RuggedWrap can even match your car color! A Ferrari color on a Ford? No problem! Contact us for OEM match projects.
TOP COAT ANTI-STATIC AND HYDROPHOBIC option: RuggedWrapDIY can be coated with your favorite was or ceramic coating. Such coatings can help bugs and road debris rinse off with water and the surface is much less prone to static dust collection than a standard vinyl wrap.
Reliable Adhesive Layer: Air release adhesive layer for reliable adhesion and removal.
Removability better protected: RuggedWrap better protects the base adhesive and vinyl resins and dramatically reduces the escape of resins and hardening of the wrap, thus aiding in easy removal even over time and in harsh environments.
Ordering Notes: Consider ordering our Application Kit along with your RuggedWrapDIY roll(s). Watch our videos on Youtube (search for RuggedWrapDIY)
Great Projects for RuggedWrapDIY:
- Rocker panel Protection in the Truck and SUV market
- Hood Protection
- Door sill Protection
- Tailgate Protection
- Track day cars rock chip Protection
- RV & Trailer Rock Chip Protection
- Semi Truck Rock Chip Protection
- Bumper wrapping with a Rugged Look
- Motorcycle rock and scratch protection
- You will invent more, let us know!
Installation of RuggedWrapDIY (See Video Here: http://bit.ly/RR-DIY-INSTALL )
- CLEAN: Start with a clean vehicle and wipe all surfaces and edges with alcohol wipes.
- Be sure to clean all edges and inside of panel edges (you will wrap RuggedWrapDIY around edges so the inside of edges must be clean to ensure good adhesion).
- Application temperatures should be 75-85F or 25-30C. If your temperatures are colder, heat your workspace for this application.
- TOP REFERENCE LINE: It's good practice to establish a top reference line to which you will match or cut the top edge of RuggedWrapDIY during installation.
- The best option is to use Knifeless tape (available on amazon or ebay). This is a line of tape you can apply to the body first, on a straight or curved line. You would apply RuggedWrapDIY over the knifeless tape. Knifeless tape has a strong filament in it and when you pull that filament, a clean cut through the RuggedWrapDIY is made and you have a perfect line. See our knifeless tape demo video here http://bit.ly/RW-knifeless
- Another option is: Our optional Application Kit has a special fine line tape in it. This tape allows you to pull a straight line, tack down at both ends of your line, even if the body has ups and downs in between, and then secure the rest of the straight line by pushing the tape down with your finger. With two ends anchored, the fine line tape will conform to the shape of the body when you push down the middle sections. RuggedWrapDIY won't stick to the special fine line tape in our application kit. So if there are some slight overlaps of RuggedWrapDIY on the fine line tape, don't worry -- once you have the entire sheet of RuggedWrapDIY applied, the fine line tape will pull out from under RuggedWrapDIY and you can squeegee down the top edge to finish off the job.
- LOW INITIAL TACK: The adhesive is very low initial tack and is easy to move on your painted surface and reposition. Adhesion is completed with pressure via cloth or squeegee.
- HEAT GUN: Sometimes for curvy sections of a body panel, warming that portion of RuggedWrapDIY with a heat gun will aid in helping it to conform. Gentle heat 6 inches away from the material is enough to soften and improve conformability.
- EDGES AND PANEL GAPS: After you have squeegeed down the RuggedWrapDIY, you can cut excess off the edges. A sharp razor will do fine or for perfect results, use our Gap Knife in our Application Kit.
- AIR BUBBLES: If during the squeegeeing of RuggedWrapDIY you get an air bubble or two, don't worry, you can pull up that section and re-squeegee it, removing the bubble.
- TOP COATING AND CARE: We recommend top coating RuggedWrapDIY. You can use our permanent ArmorShell Coating. This is a one time top coat that will waterproof and make RuggedWrapDIY anti debris and anti static. Or you can use your favorite liquid wax or ArmorAll, 303 protection etc.
- REMOVAL: If the time comes to remove RuggedWrapDIY, it will be easy if the ambient temperature is above 80F or 30C. If it's a cooler day, warm your workplace and use a heat gun to gently warm the RuggedWrapDIY. Peel away from the original finish by grabbing and edge. It will peel reliably and for some areas that seem a little strong, just warm it somewhat with a heat gun.
- CONTACT US: Let us know how your install or removal process was! We're here to help!


